Mobile Chrome Browser Traffic: Physical Device
INFO
- Be aware that the exact names and locations of setting options may vary between devices.
- Ensure to pay attention to any prompts on the device itself while proceeding through these steps.
- Ensure the device is connected to the computer running Caido via USB and that both the device and the computer are on the same Wi-Fi network.
TIP
For convenience, consider adding all installed tools/tool packages to your system PATH environment variable to avoid navigation/the need to use absolute paths in commands.
To proxy HTTP/HTTPS traffic generated by the Chrome application (the default mobile browser installed on Android devices):
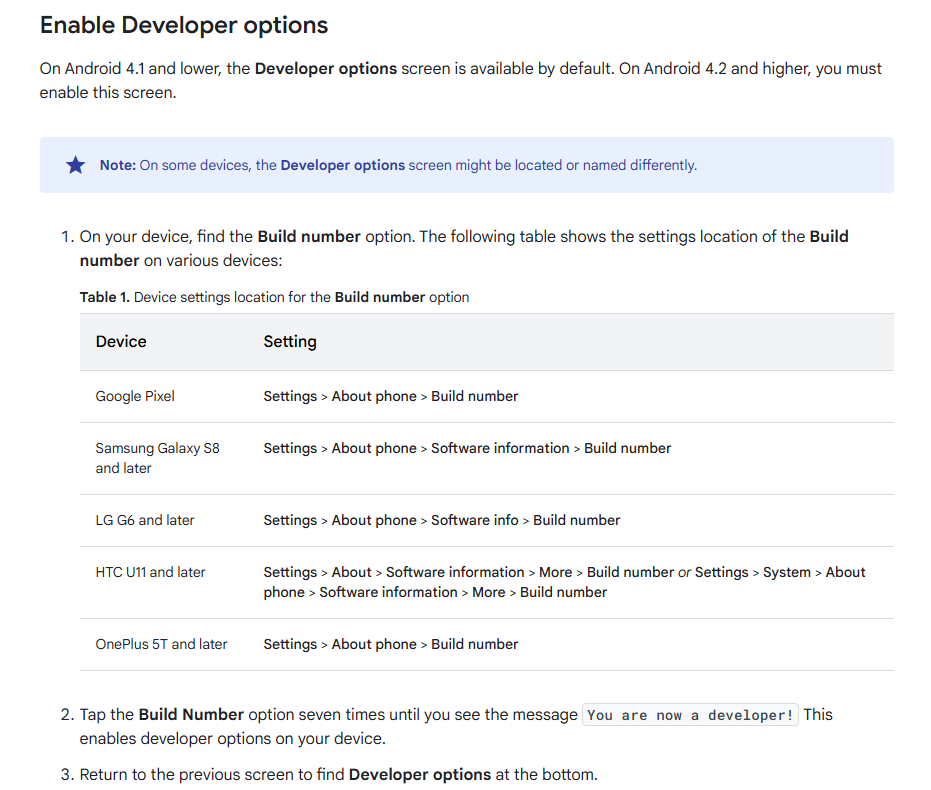
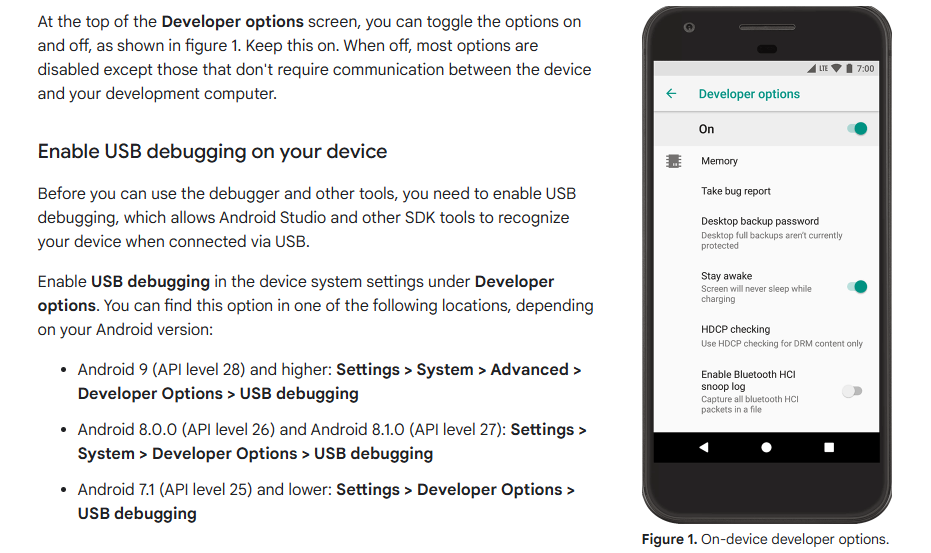
- Navigate to the device's settings and enable
Developer optionsandUSB debugging.
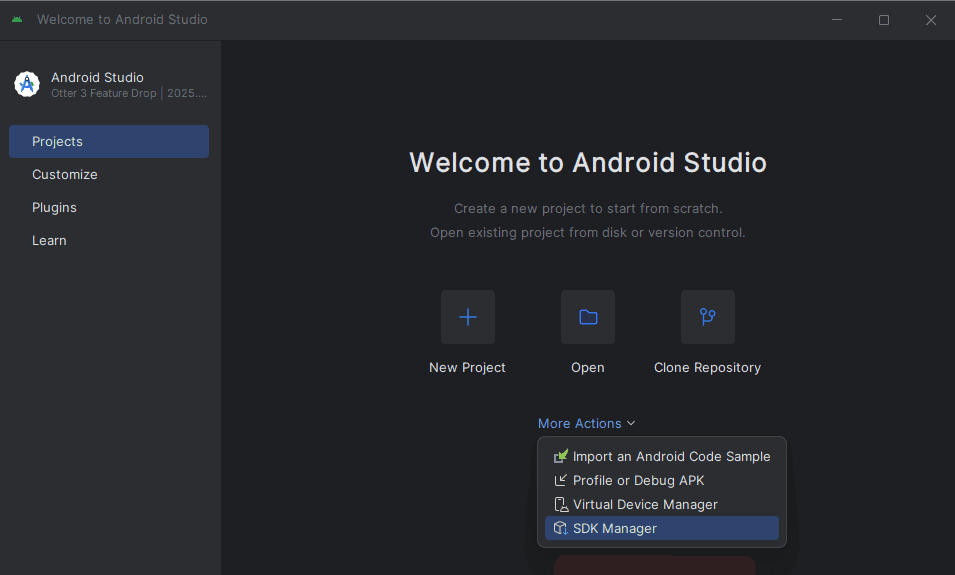
- In the Projects interface of the Android Studio window, click on the
More Actionsbutton and selectSDK Manager.
Select
Android SDKfrom the Languages & Frameworks drop-down menu.Open a terminal and navigate the the file system location stated in the
Android SDK Locationfield.

Navigate into the
platform-toolsdirectory.Connect your Android device to your computer via USB.
Execute the
adbtool withdevicesto ensure the device is listed.
./adb devices
- Execute the
adbtool with the device ID as the value of the-sargument andreverse tcp:8080 tcp:8080to forward traffic to Caido.
./adb -s <device-id> reverse tcp:8080 tcp:8080On the device, navigate to the Settings interface and select
Network & internet.Click on the
Wi-Fisettings.Click on the
button of your Wi-Fi SSID.Click on the
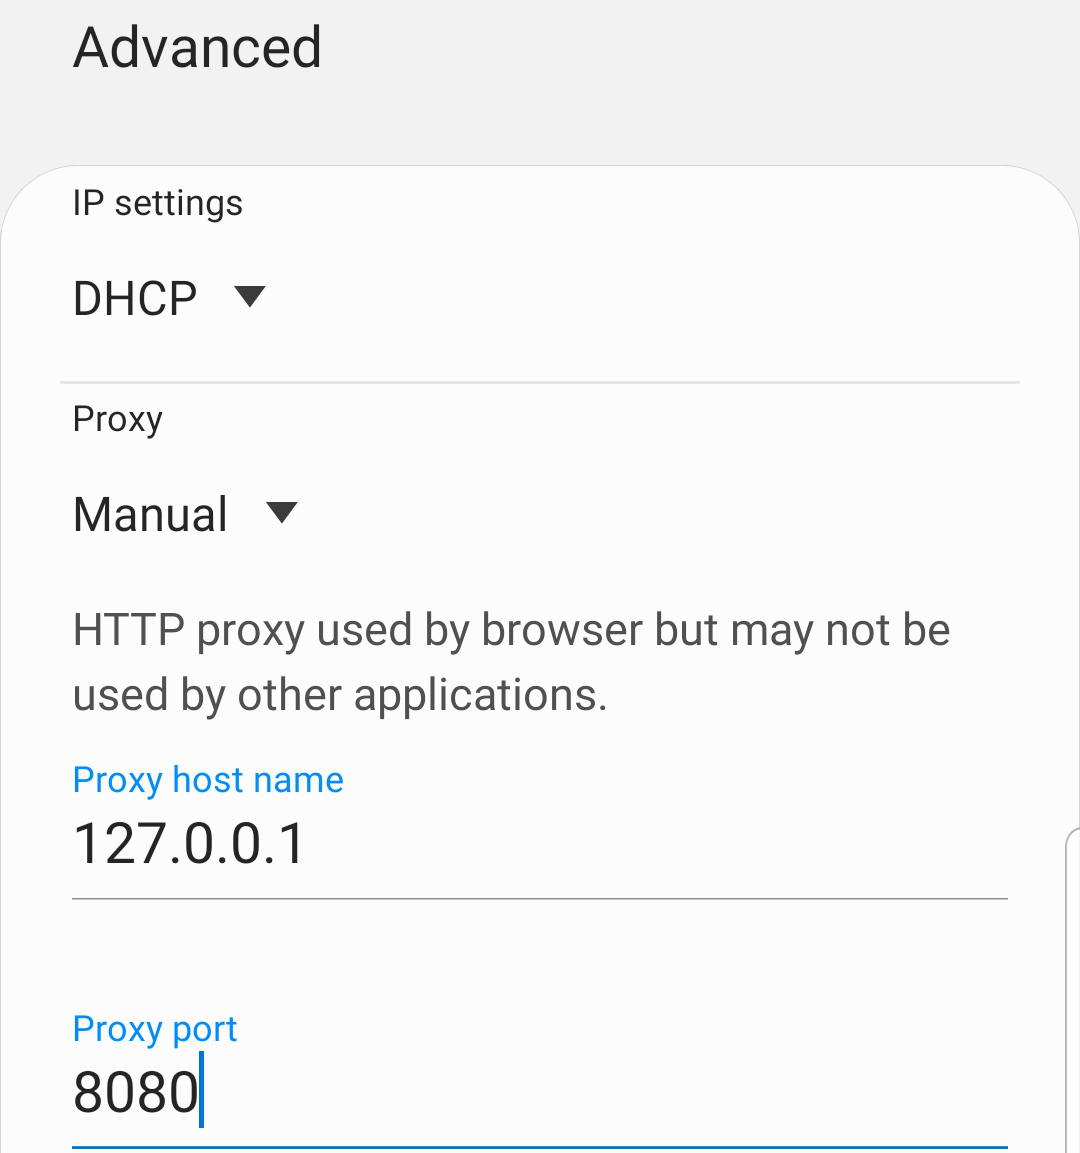
button and expand theAdvanced optionsdrop-down menu.Click on the drop-down menu under Proxy and select
Manual.Set the Proxy hostname to
127.0.0.1, the Proxy port to8080, and clickSave.
With Caido running, navigate to
http://127.0.0.1:8080/ca.crtin your device's browser.Click on
Downloadto download Caido's CA certificate.Click on
Closein the notification window and navigate to the Settings interface.In the
Search settingsinput field, search for and selectInstall a certificate.Click on
Install a certificateand selectCA certificate.In the security notification screen click on
Install anywayand select Caido'sca.crtfile.
TIP
To verify the addition of the certificate:
On the device, navigate to the Settings interface.
In the
Search settingsinput field, search for and selectTrusted credentials.Click on
Trusted credentialsand locateCaidoin the User tab certificate list.
Once the certificate has been installed, navigate to any domain using either the http:// or https:// scheme and view the HTTP History traffic table in Caido to inspect the traffic.
NOTE
If traffic is not appearing in the HTTP History table in Caido, try:
Disabling
Mobile datausage.Disabling any VPN connections.
Setting the Wi-Fi Proxy hostname to
10.0.2.2.